How to Make a Crane Tree
When Mike and I moved into our first house last fall, we realized we had little furniture…and even less of the décor that makes a house feel personal, unique, and alive. We also realized outfitting a house can be very expensive, and new furniture really is a luxury. Because we didn’t (still don’t) have tons of money, we sought out ways to make the house look good and have pieces to sit on without selling our plasma. And of course, we found them. Craigslist, the sander, and a couple quarts of stain became our new best friends, and I’m happy to say that our house is much more home-like, we haven’t spent much money, and we don’t have to sit on the floor.
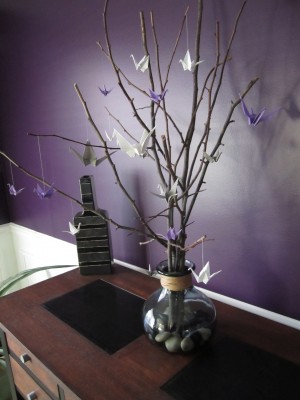
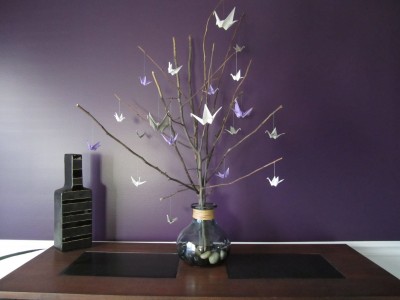
I’ve really enjoyed deciding how the rooms look. I know it’s a little silly, but I have themes, especially so in the bedrooms. However, my theme-ing is creeping out all over the house. The half bath has an Asian flair to it, despite two purple walls. The library is full of vintage items and some pieces that my friends native to other countries have brought me. The dining room, oh the dining room…it can’t quite be called a zoo, but I do have two pineapple plants, art featuring a giraffe and an elephant, and my favorite piece – the Crane Tree.

The idea honestly just occurred to me as I was cutting those pesky shoots that sprout up from the bottom of trees. Our house had not been lived in for quite some time when we moved in, so the yard left something to be desired. And the trees and shrubs needed serious work. I cut a slew of small, young branches, and as I took them toward the trash bin, I thought, “Dried and in the right vase, these would cost some serious money at Pier One.” I put them in the garage and left them there for a couple months to thoroughly dry. They did so quite beautifully, and with them, I made the Crane Tree. And you can make your own.
Here’s what you need: Dried branches (You can cut them like I did, or just find some in the woods), florist wire (that green stuff you use to hang Christmas decorations), a cool vase (I got mine for $8 at TJ Maxx), some tumbled, river rock (two $2 bags from Garden Ridge did the trick), paper, a needle, and string.

Here’s what you do: Arrange your dried sticks so they look rather like a tree. Wrap the “trunk” with florist wire so they stay together. You don’t have to use a lot, just enough to be sure they don’t shift around. Put some rocks in your vase, and position your tree. There, that’s the easy part. (And yes, it will look great if you stop right there.)
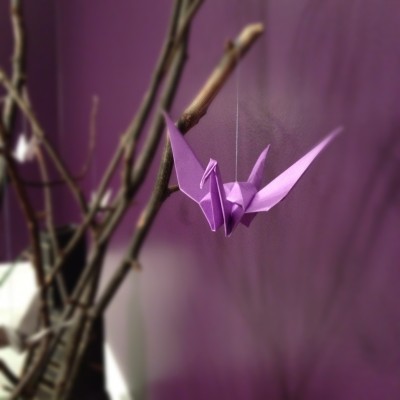
Last week, I posted about folding paper cranes. So for directions on folding, consult that post. Decide on a color scheme and fold your cranes. I used purple, grey, and white because I had painted the dining room a dark purple. Using the needle, run thread through the cranes for hanging. Arrange. Because of the way they are folded, the cranes actually lend themselves quite well to threading and hanging.

I decided to hang cranes on my tree for a couple reasons: 1) They’re super cool and pretty, and this is technically reason enough; 2) Paper cranes will always hold a special place in my heart simply because they remind me of the people I have met from all over the world, people I dearly love; and 3) The Japanese legend states that whoever folds 1,000 paper cranes pleases the gods and will be granted a wish. This act is sometimes performed for a loved one, and the action brings good luck. Very obviously, there are not 1,000 cranes on my Crane Tree, but I’ll take all the luck, peace, and fortune I can get.
Leave a Reply