How to Make a Tie-up Shade
Some months ago, Mike brought a prize home for me. It was the end of a bolt of decorator fabric. Off-white and brown, scripted writing scrolled all over it, and it was perfect. Mike’s friend Tony’s wife refurbishes old furniture for resale and had some fabric left over from a reupholstering project for which she had no use. Mike got it for cheap, and I immediately knew I wanted to make it into a curtain for the library.
Because it was left over, I didn’t have enough fabric to make full drapes, and honestly, they aren’t my favorite window treatments anyway, so I wasn’t really disappointed. That said, the dimensions of the fabric limited me. I pondered for some time and finally settled on making a tie-up shade. This type would dress the top of the window but wouldn’t need to reach all the way to the floor. Using leather tie-ups would complement the fabric and fit right into the décor of the room. Settled.
If you are thinking of making your own window dressing (tie-up shade or otherwise), I suggest you find a mother, preferably a mother who sews or has sewn. This could be your own mother, a grandmother, aunt, or family friend. In my case, I found Mike’s mother.
Mike’s mom Wanda is an award winning interior designer, so though my own mother has vast experience sewing (she used to make most of my clothes when I was a little girl), I picked Wanda. She’s made and picked a lot of window dressings, and I assure you that my tie-up shade would not have turned out half so well had it not been for her guidance.
Okay, so you want to make a tie-up shade. Time to get down to stitching.
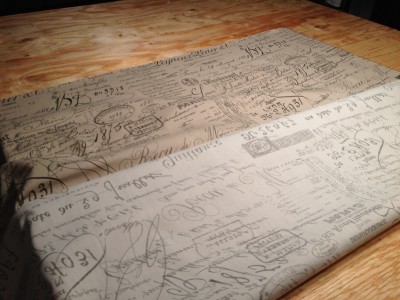
Here’s what you will need: decorator fabric, backing fabric, thread, your curtain rod, and a sewing machine. (You could, of course, hand stitch if you are overly ambitious, but I assure you it’s going to take a long time.)
First: measure, measure, measure. You need to know the dimensions of your window. Don’t just measure the window itself. Your shade can, of course, fit inside the window frame if you want, but this is not typically how most shades hang. If you’re using a rod to hold your shade, then the ends of the rod will not look right unless they are wider than the window frame.
Next, find a wide-open place to work. Wanda and I made my shade in her basement with plywood laid over the pool table to create a giant worktable.
Spread out your fabric and make some decisions. How long is your shade going to be? Mine was limited by how much fabric I had.
For the dimensions, remember that you need to add a seam allowance that you will turn under as you hem. This seam allowance is typically 5/8 inch. You will need to add this to both sides of each dimension. So, add 1 1/4 inches to your window measurements (width & height).
Additionally for the width (you can do it for the length as well, but for a tie-up shade it’s not necessary because of how you will fold it), you will need to add 2 inches onto each side, so that when the shade hangs, you will see the face fabric on the side not the backing. So that’s an additional 4 inches you will need to add.
So currently, if your window measurement is 78 inches wide, you will need to add 5 1/4 inches to your cut. The width you will need to cut is 83 1/4 inches.
Once again, the length of my shade was predetermined by my fabric dimensions, but I did have to allow for my rod pocket and make it the appropriate size to fit the rod. To do this, use a tape measure to determine the circumference of your rod. So let’s say your rod is one inch in circumference, add 1/2 to 1 1/4 inches (depending on how tight you want the fit) to the circumference. Like me, you decide you want it to be medium snug. So you add 3/4 inch. The amount of fabric you will turn down for your rod pocket is 1 3/4 inches.
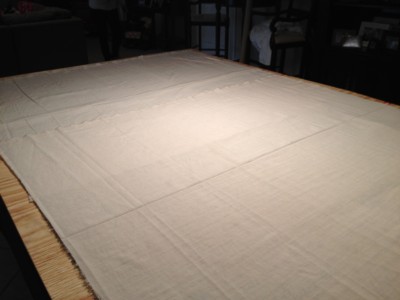
Once your face fabric is cut, you will need to cut the backing. Your backing will need to include the seem allowance, but you will not need to add the extra two inches you added to the face fabric width because you want the face fabric visible. So the width of your backing fabric would be 79 1/4 inches. As you can see my backing had to be two pieces stitched together because of the width of that fabric.
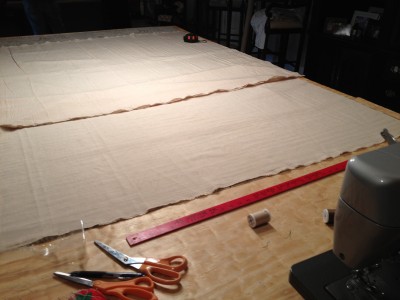
Okay, so your fabric is cut now. Lay it out for pinning. Remember that you will turn the piece inside out, so you lay the face fabric face up on your table. Then, lay the backing material on top of the face fabric and pin measuring 5/8 inches from the edge of both pieces of fabric. You can do one side at the time if you want. Stitch the sides before you stitch the bottom. Remember that the face fabric will have to fold over two inches. Before you press, it’s going to look weird, but trust me, this is what you want. Once you’ve stitched the sides, press the material so the fold over creates an edge. It will make the fabric easier to work. Then, stitch the bottom.
Now, it’s time to stitch the top, but don’t completely close the top up. You want the face fabric attached to the backing, but you need to be able to turn your shade inside out, so you can actually see your face fabric and hide your seams. After you stitched most of the top, turn the shade. Then, you can stitch the hole closed, keeping the seam as close to the edge as possible. Remember to keep both the face and backing turned under as you do it so you don’t have a weird seam sticking out.
Time for the rod pocket. Turn down the top, being careful to turn down the correct measurement (1 3/4 inches in this case) and stitch it.
Viola! You have made a tie-up shade. To hang it, accordion fold the bottom of the fabric turning up three inches with each fold once you have reached your desired hanging length, secure the folds with clothespins while you hang the curtain.
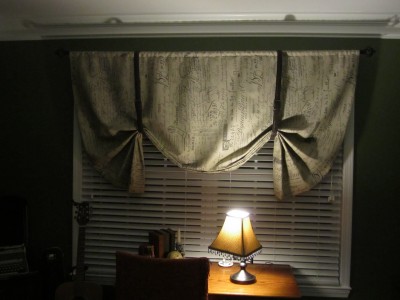
Once the curtain is hung, position your ties. Mike suggested I use belts for ours. Their length is easy to control, and the leather was a perfect accent to the shade. After your ties are positioned, remove the clothespins and the shade will fall beautifully.
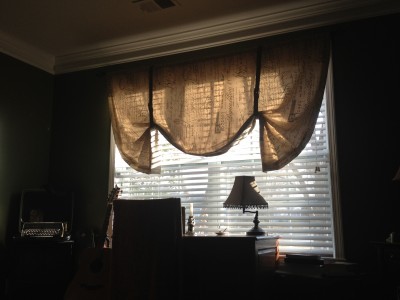
Sit back and admire your work as you read a book, or drink coffee, or whatever makes you happy in the room. You deserve it.
Leave a Reply